Damascus steel is steel which shows patterns in the surface of the steel. These patterns are usually made by combining different types of steel into 1 bar. By flattening, folding, twisting, and manipulating the steel in various ways, these different types of steel form a 3D pattern inside the steel bar. Using such steel, you can make a knife in the same way you would make a knife in plain carbon steel. After the blade is ready and polished, it is then etched in some kind of acid to make the pattern visible.
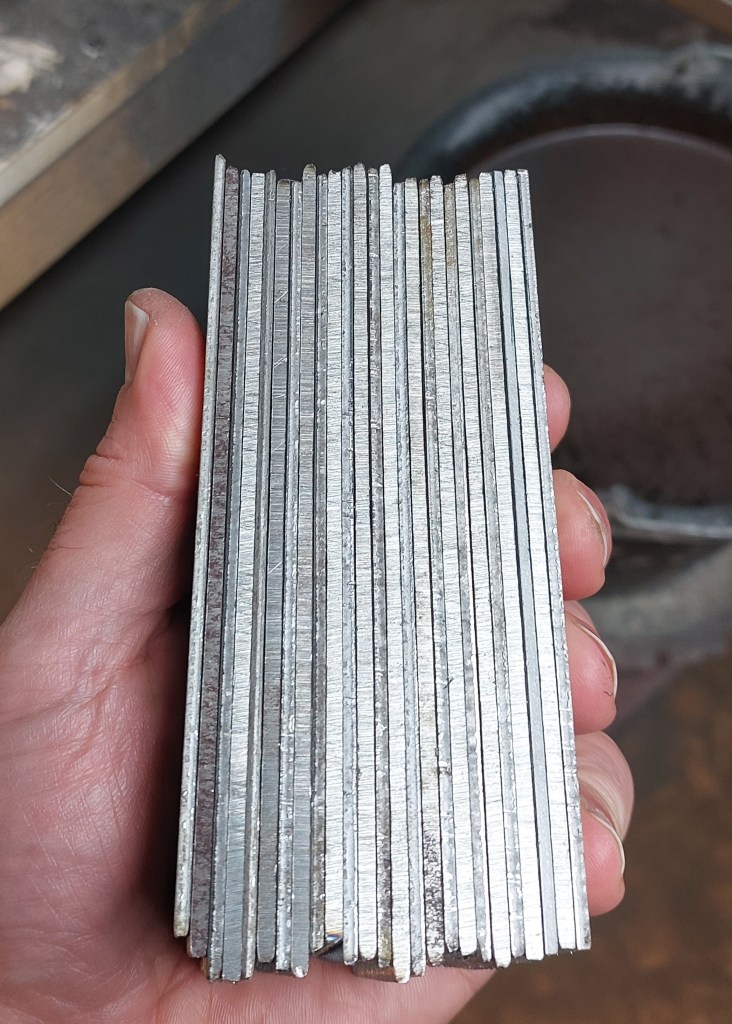
For this knife, I work with 2 types of steel: O2 and 15N20. O2 is the type of steel I often use when making knives in plain steel. 15N20 is a type of steel that has similar properties as O2. The biggest difference is that 15N20 has 2% of nickel, whereas O2 has no nickel at all. It is the nickel which will be responsible for making the pattern visible. Every project starts as a simple stack of steel with alternating layers O2 – 15N20 – O2 – 15N20 – ….
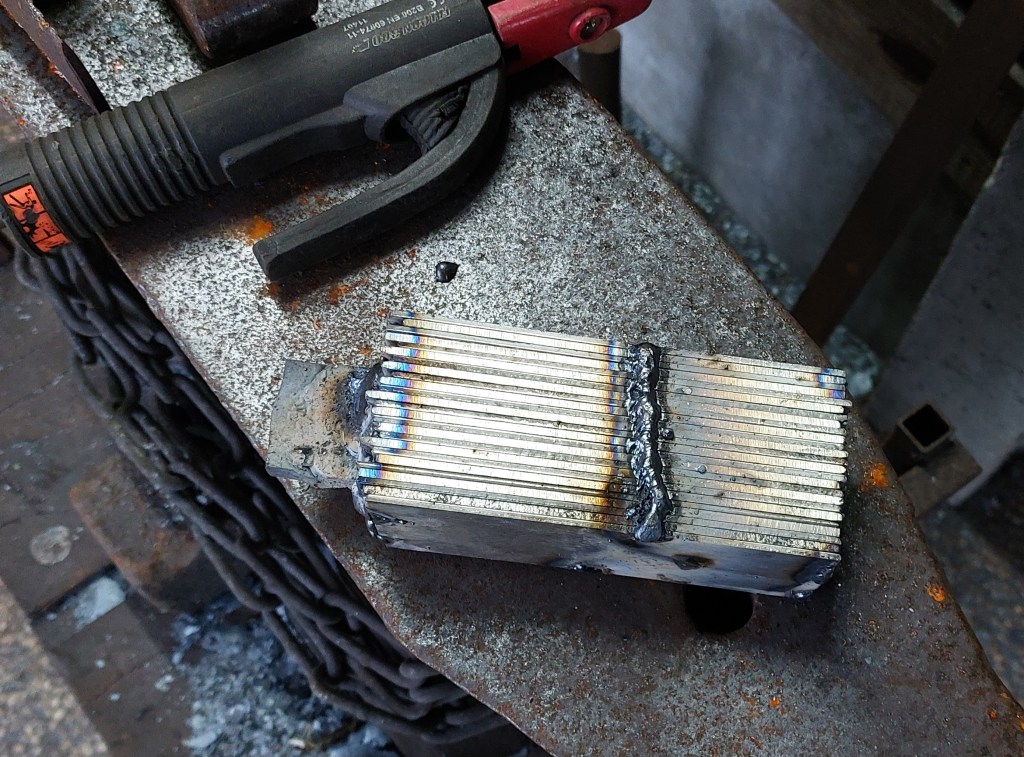
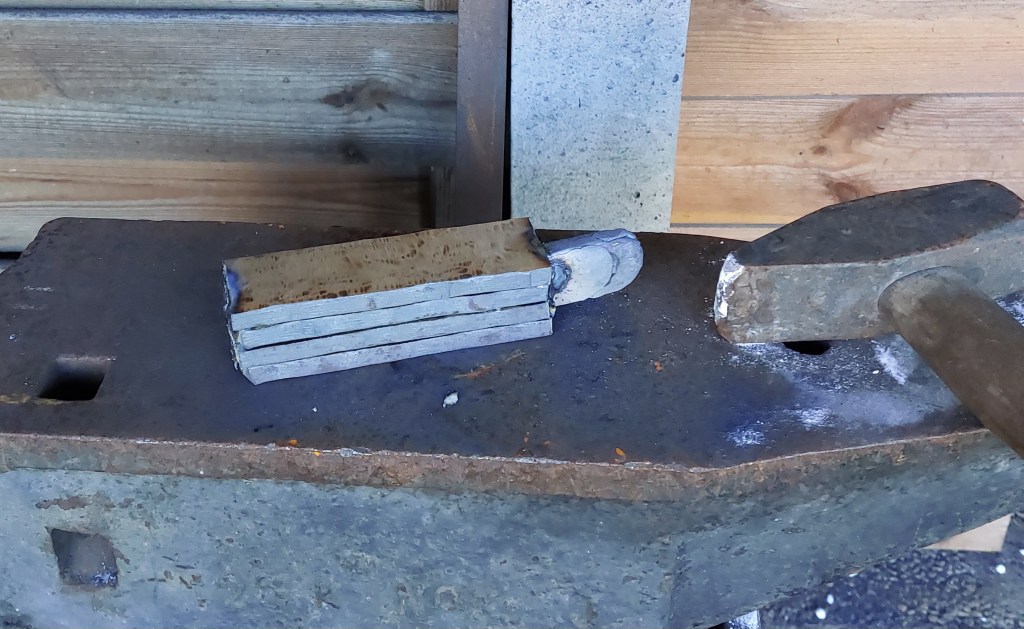
This stack will be forged into 1 block of steel, in a process that is known as forge welding. The steel will be heated up to almost 1200 degrees Celsius, at which point the steel becomes sticky. It is then hammered flat to make all those layers stick together. To make sure that everything sticks together long enough for this process, and to prevent the stack from falling apart, those layers are first welded together with a simple arc welder. I also weld a small scrap of steel to the end so that I can easily pick it up with tongs.
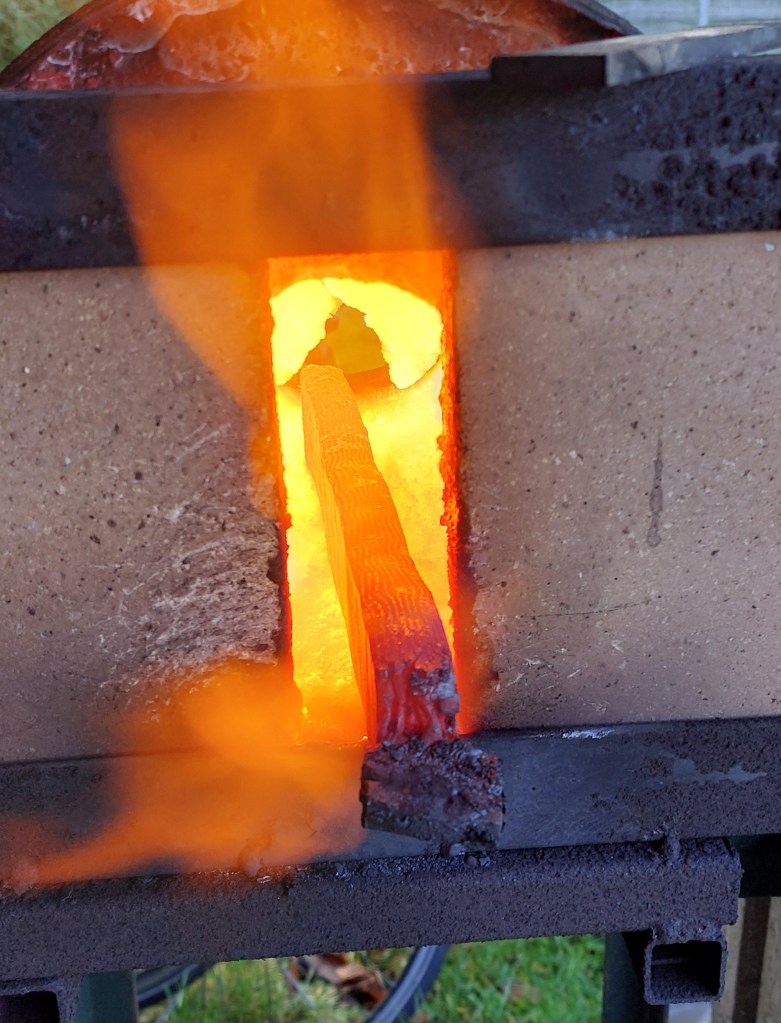
This block is then put close to my forge fire to warm up first. At this point, all those individual layers are very thin and if I put this directly in the fire without pre-heating, the outside layers will be hot quickly while the inside is still cold. Warm steel expands, and the warm layers might bend in ways that allow a lot of air to come in between, and this could cause problems. Usually when I am pre-heating the steel, I do some other simple forging work so that instead of wasting the heat (and the propane) I do something useful.
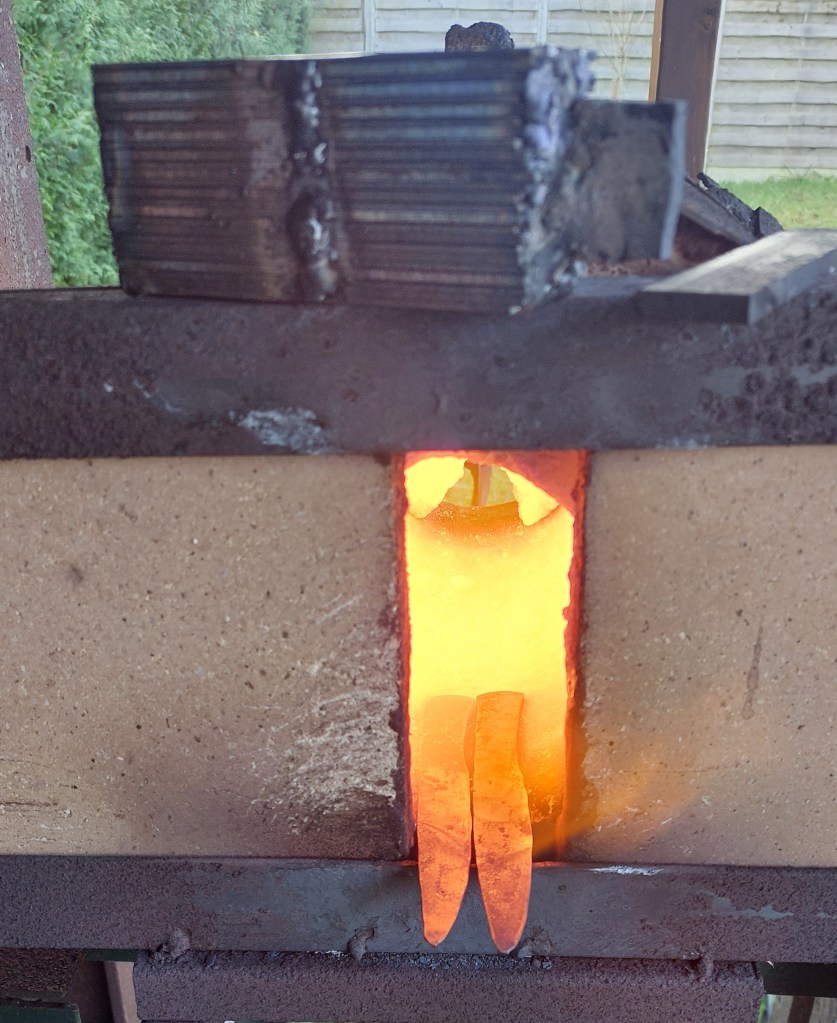
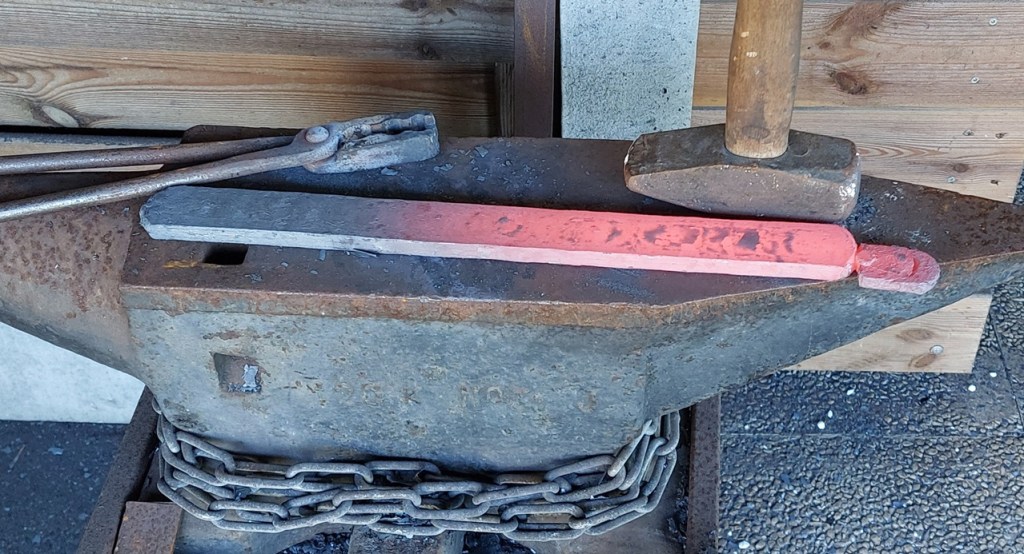
When the steel is warmer, it goes into the fire to heat up until it glows. This can take 20 to 30 minutes, depending on the amount of steel, the exact temperature of the fire, etc. When the steel is glowing bright yellow, I take it out and hammer it with a simple hand hammer to get the layers to stick together. I don’t have a picture of this because I am using both hands at that time. The purpose of this hammering is not to flatten the steel yet but to get everything to stick.
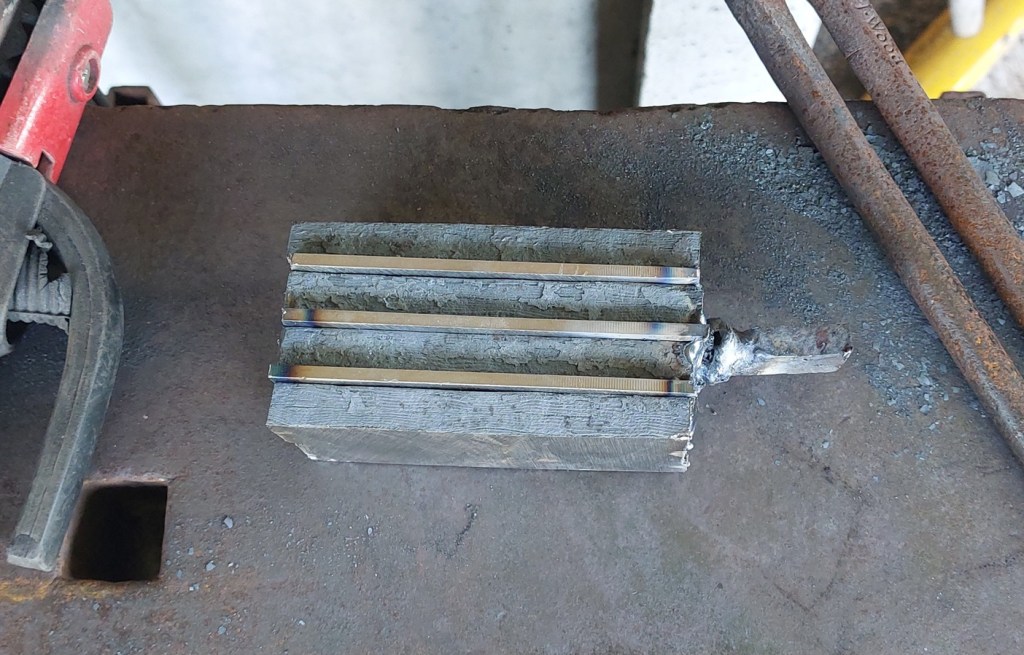
At this point, it is also time to remove the welding I did in the beginning to keep everything together. If I leave the welds in place, this would become part of the steel and be very ugly. Plus it would not become hard. I use an angle grinder to do this. If the steel is hot, this is very easy to do because it is soft.
As soon as those original welds are removed from the steel, it goes back in the fire until it is hot again, and then the real work begins. Fortunately, I don’t have to flatten the steel with only my hammer. I have built a big hydraulic press to do the work for me. The press can squeeze blocks of hot steel as easy as if it was dough.
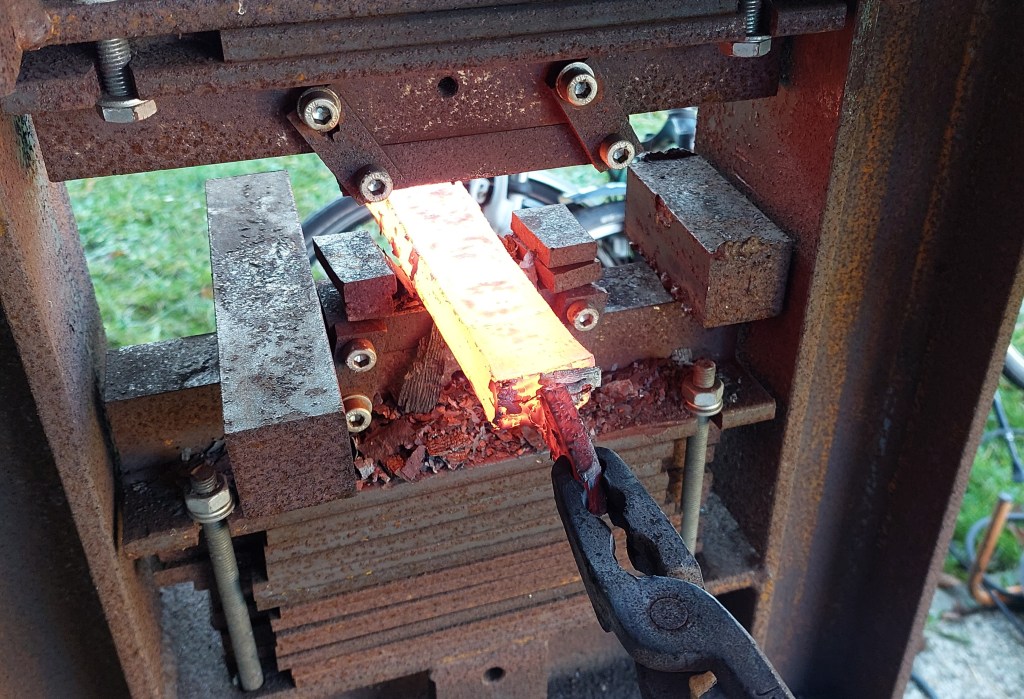
Pressing the steel like this makes it flatter and longer. During this process I use my hand hammer only for straightening the bar or small corrections.
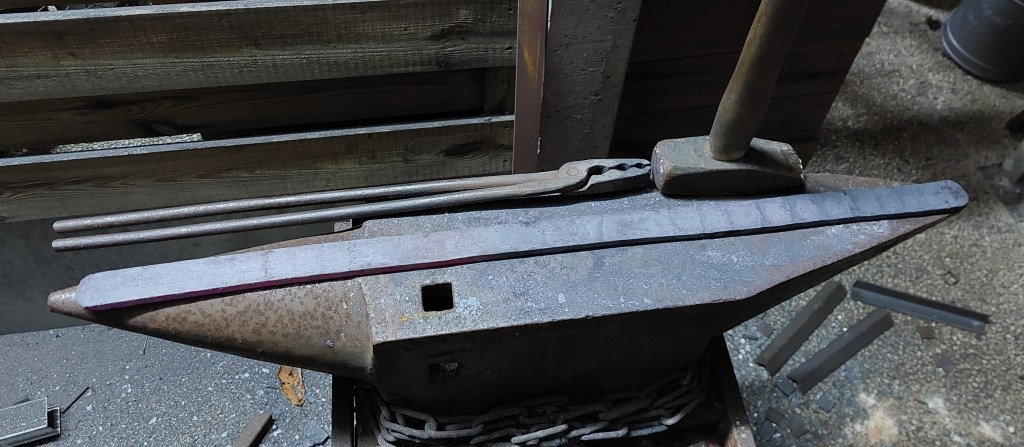
After repeated cycles of heating and flattening, I finally have a solid long bar of steel, that has an internal structure of 20 layers.
Now I clean all the black firescale from the bar using an angle grinder, cut it in 4 pieces, and make a new stack.
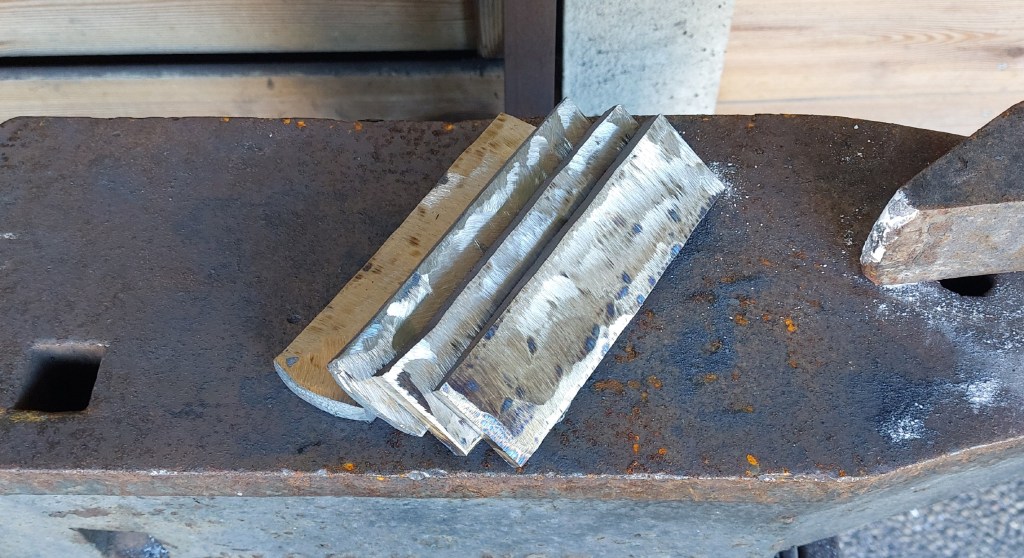
More forging and flattening, and then I have a bar that is 80 layers.
I clean it and cut it in 4 pieces again, and create a new stack, but add 1 thick layer between each piece. The composition is now 80 – 1 – 80 – 1 – 80 – 1 – 80.
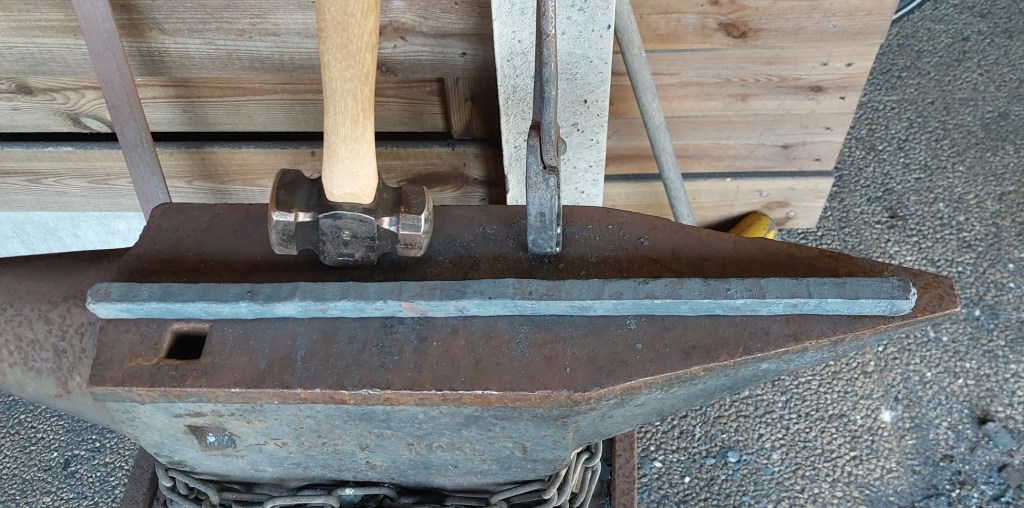
We forge this into another bar, but this time we leave the bar square instead of flat:
At this stage, the bar itself is finished. Now it is time to clean up the bar with an angle grinder and make sure that we remove any small cracks and openings. Where all those different bars are forged to each other, there is always the risk that on the very outside, there are some imperfections. Usually this is not a problem but for out next step it is important that there are no faults in the steel.
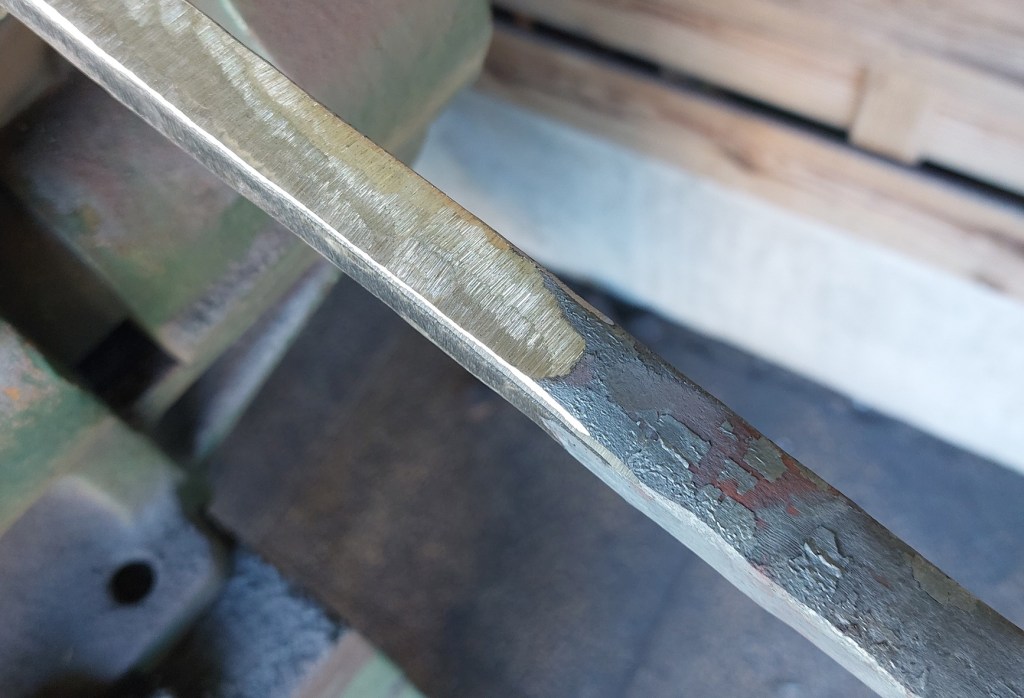
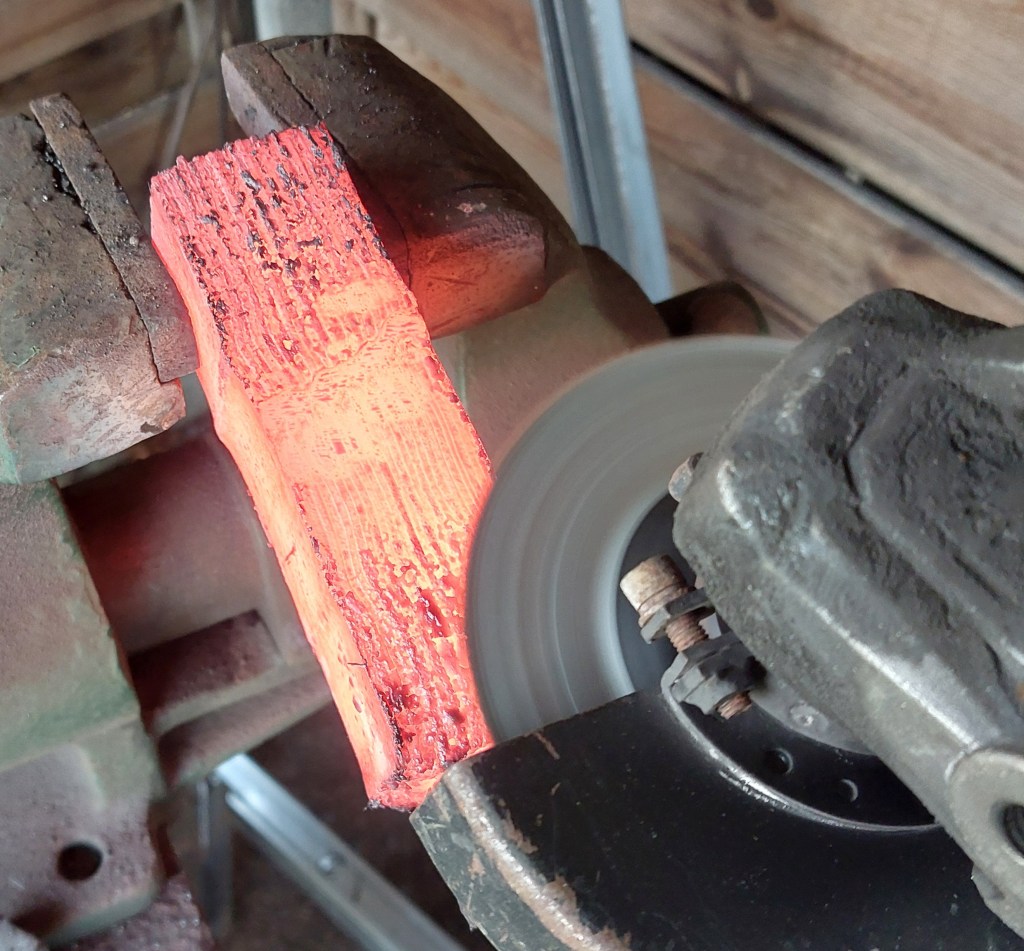
When the bar is nice and clean, I heat it up until it is very hot, clamp it securely in my bench vise, and twist it using a modified pipe wrench.
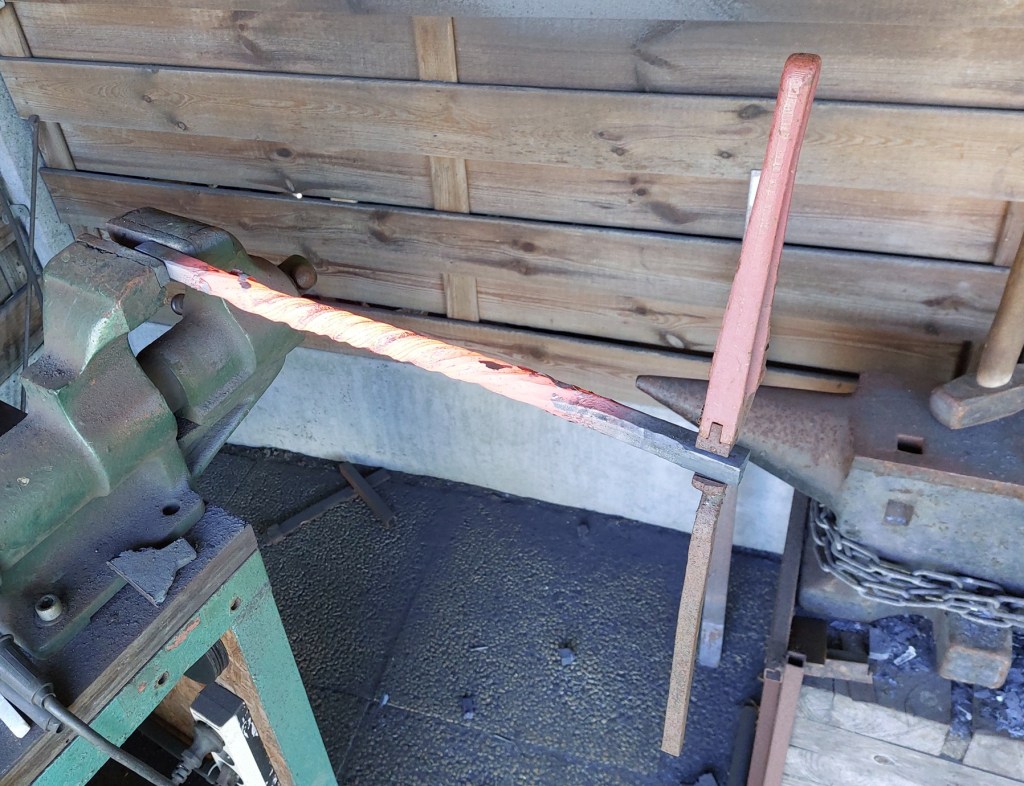
This can only be done if the steel is very hot. If it is too cold, it can start to deform in a manner that will damage the steel. Additionally, the amount of force that is needed will be so large that it becomes impossible to twist. I twist until the steel starts to resist. At that point I take it out of the vise, heat it up again, and repeat. You can see that it is hotter in the middle. The reasons are that my fire is hotter in the middle, and also that where the steel touches the vise or the wrench, it cools quicker. To deal with this, I heat the steel in different places so that in the end, the steel is twisted more or less the same everywhere.
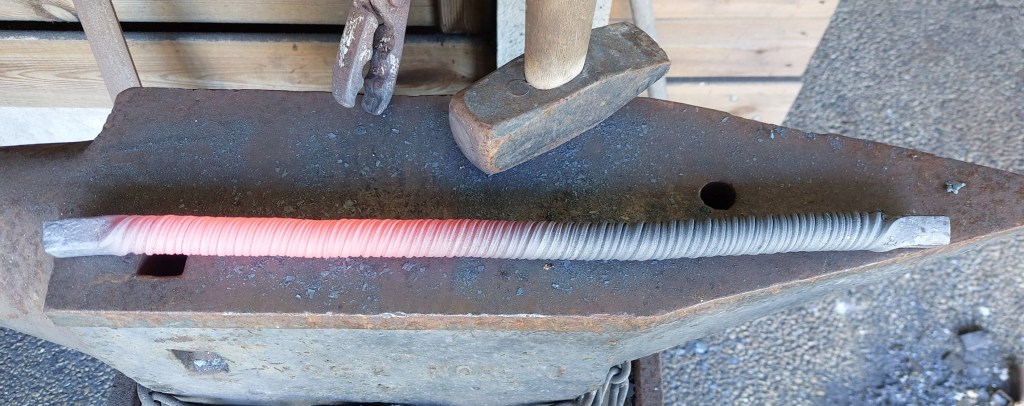
Now it is time to hammer the round bar into a rectangle again. This is something I do with a hand hammer because a press is good for many things, but this is not one of them. If you press a piece of twisted steel too hard, you risk that the spiral will tear itself apart. So I do this by hand.
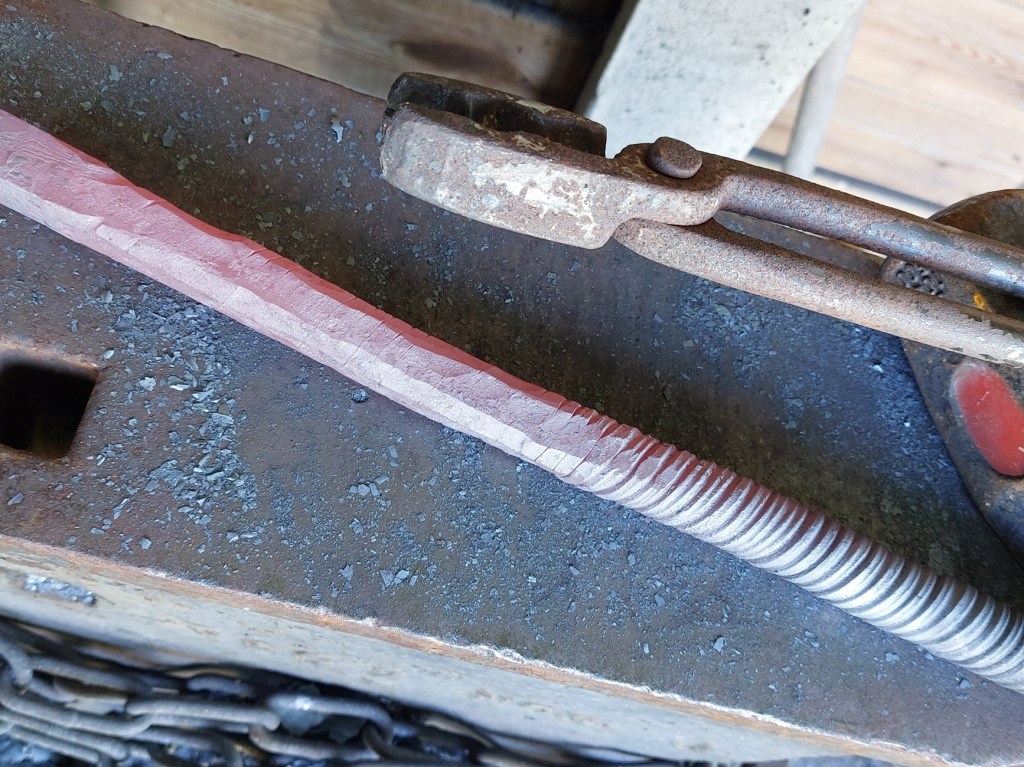
I removed the visible lines on the outside with my angle grinder, and then cut a piece from the bar to make a kitchen knife. As you may remember from my previous kitchen knife explanation, I like to make the knife so that where the blade goes into the handle, it is 1 thick piece of steel. Unfortunately, our bar of steel is not thick enough to work like that. The only way to do that would be to work with a thicker bar of steel, but twisting such a thick bar of steel by hand is impossible.
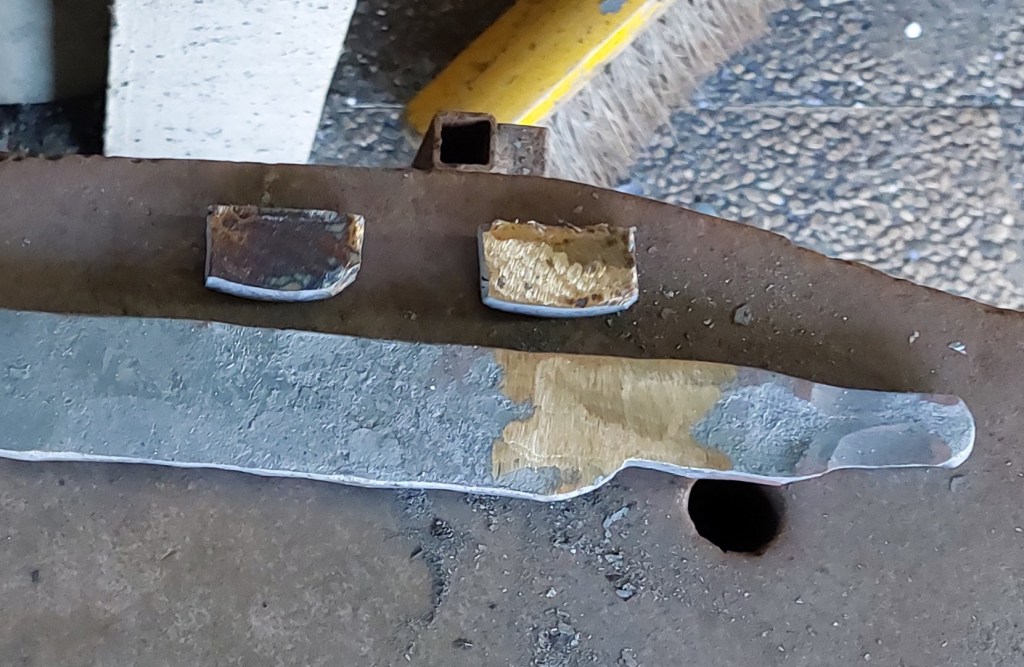
The steel is thick enough to make the knife that I want, but not to make a thick transition. However this is something that I can fix easy enough. First I forge the knife shape that I want. Then I cut a little piece from the original twisted bar and hammer them into 2 little ‘ears’, and I forge weld those little ears on the blade where the transition to the handle will be. And then I finish the knife.
I also made a little knife from the same steel. Because a little knife also has a smaller transition between the blade and the handle, I could make the little knife from 1 piece of steel without needing to do anything special. The edge of the long knife will be 30 cm long. The little knife has a 10 cm edge.
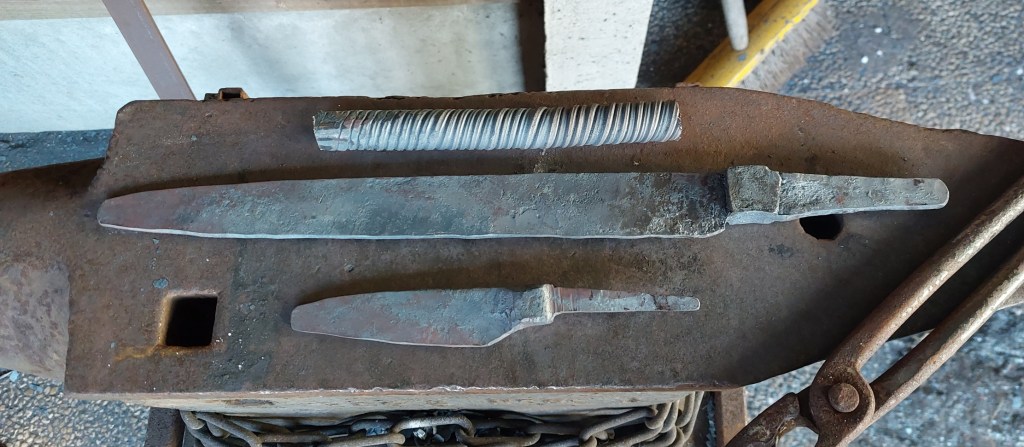
As you can see, there is still quite some twisted steel left over. This is intentional I always make much more steel than I need for a project. There are several reasons. Making big blocks of steel is much more efficient than making small blocks. It is also safer: should I make an error when forging a knife with the steel in such a way that I cannot fix it, then I don’t have to start over from scratch. And finally, if I don’t make mistakes, then I have a nice piece of steel left over that I can use for other projects.
